
 |
communications station, set-piece for upcoming dio
Snake Eyes peers out the door, weapon drawn, ready for action...as the "man of action" just looks out the window.
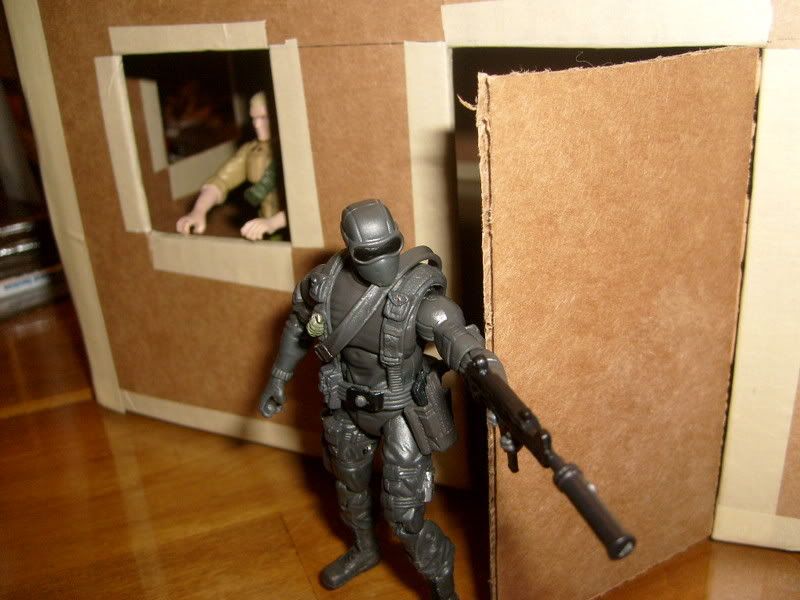 An overview, to give you an idea of the size here. 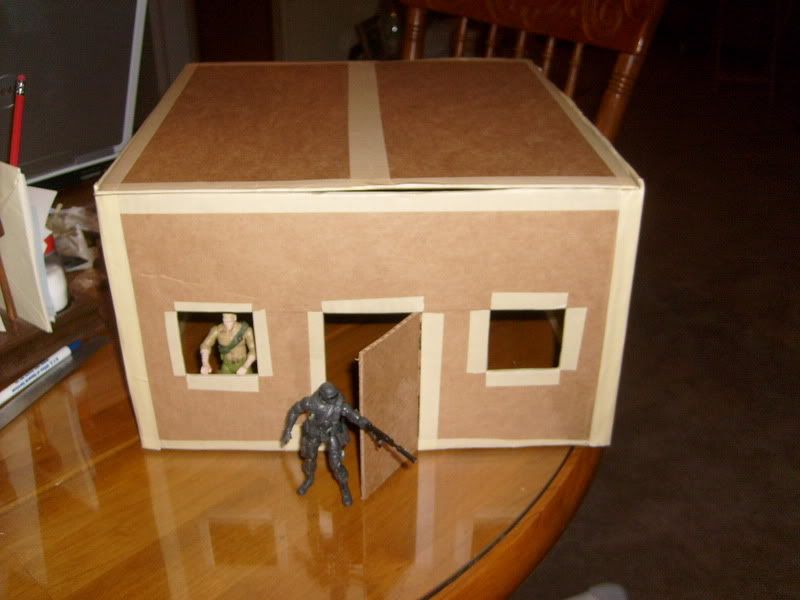 Removable roof, a shot of the inside, thus far... 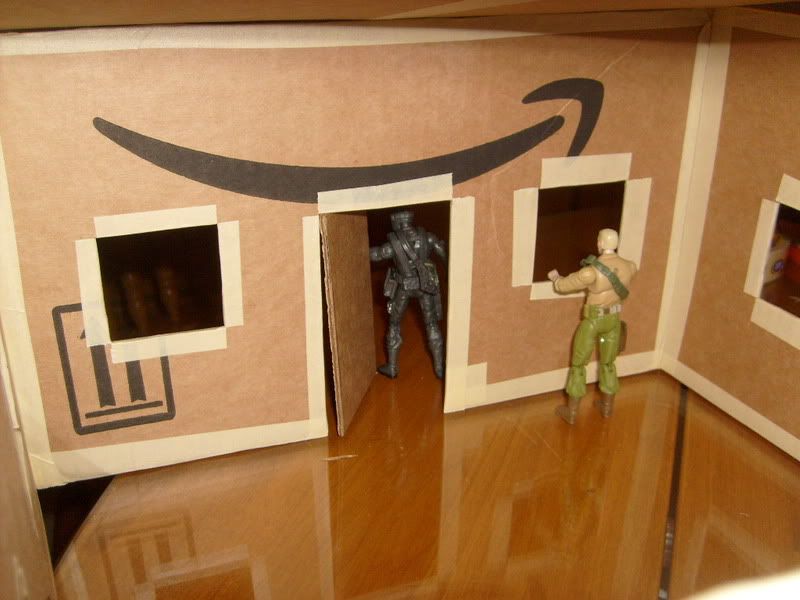 Duke and Snake Eyes "discussing" where this project is heading... Duke now knows that discussing this with a mute is not the easiest way of going out this, and thinks it should be thrown out to JoeDios for some input. 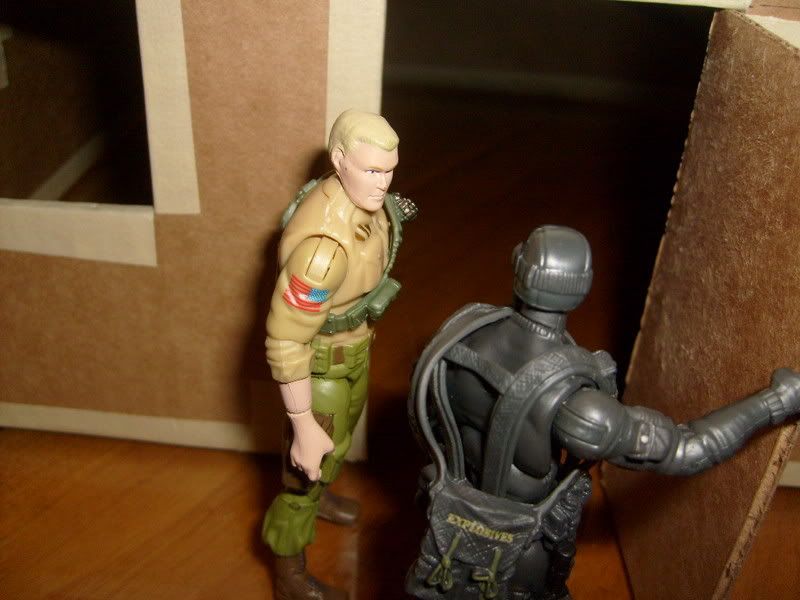 Duke is checking JoeDios every so often, seeing if anybody has any suggestions on where this Communications Station should be located (arctic, foresty, jungle, etc), what kind of building materials (brick, metal siding, etc.), awesome additions that will really knock this set out of the park, etc... 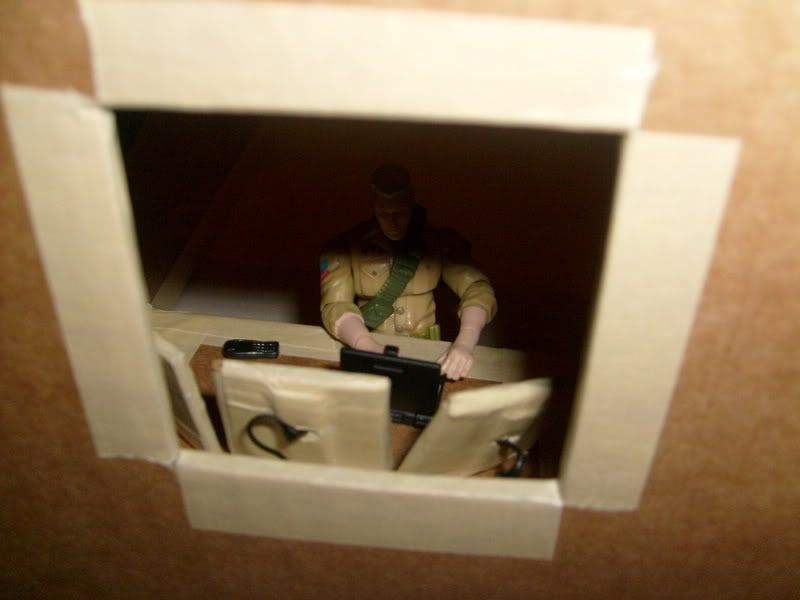 A look at the desk set-up from the inside...I'm thinking it will be a wooden desk. It has 3 flat-screen monitors that will have cool computer screens on it soon. 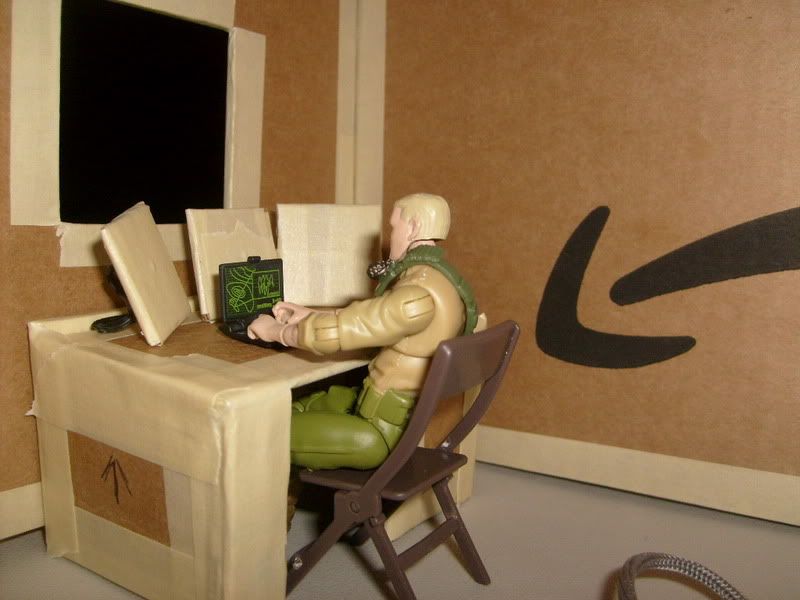 So that's where I'm at thus far. I'd like to personally thank fifthconspiracy for the inspiration and "how-to" here...he really got me rolling on this. The roof is removable, and the back wall will be also. I'm going to build an antennae set-up for the roof, complete with radar/satellite dishes and arrays. There is going to be a perimeter fence set up surrounding the outside. Please, suggestions are extremely welcome!! |
Wow!
This is a fantabulous start to your diorama!
Mods - consider moving this to the How-To section of the forum, this dude's modest. Too modest. Back to the diorama showcase! ~ Very nice setup, you're going bawls-deep here, it's large! Which will be cool for photo-taking once you're done. If you're going wood for the exterior, I would not use popsicle sticks... your building is too large for popsicle sticks and you'll have problems making them "appear" straight. I would go and get manufactured wood slats for the exterior; I've seen some at Michaels here in my hometown. Make sure you frame around all the shapes ~ windows, doors etc... as you apply your exterior think about how you will slap on window frames, door frames etc... so you have enough room. For those awesome window holes, I'd go with a 4-section glass-look, splitting the window into 4 places. And maybe window-shutters? Who knows! For the roof, I like that flat roof, fits the building, especially a communications building. I would make sure there's at least a 1"-2" ledge around the top, such that joes don't fall off ;-) - and it would look more realistic I think. Then you can apply tar-paper as the roofing material which would look sick. Love the desk idea - that's cool. I laughed when I saw that - looks like my setup at work! Duke should've went widescreen tho ;-) Wicked start, I'm glad you're showing as you go. My son and I are looking to learn from what you're doing here! Bed Bath and Beyond my Friend, I don't know if we'll have time!.... Cheers! ~ Paul. |
Oh sure, S13. Don't put this in the HOW-TO or anything. :p
|
Ha, well, G, I just didn't think it really belonged with fifth's, yours, Frank's, etc. But, if you guys think so...it can be moved, that's fine. I'll try and take more pics as I'm going.
Fifth, first of all, I think you and I are more on the same level than I originally thought, because if you're quoting "Old School" to me, than you my boy, Blue! Secondly, thank you for your advice and tips. I will definitely be hitting up Michaels this week (hopefully tomorrow) to see about the manufactured wood slats (and some stain). Also, I intend on making a ledge, so thank you for the reminder and the tar paper would definitely give it that real-world appearance that I'm like to strive for, so great idea! I'm trying to figure out the size/shape/etc. of the antennae/satellite arrays that I will be putting on there. Also, I'm going to make another roof, this one just a plain sheet of cardboard, with several holes cut in it where the light will come through (utilizing tissue to dissolve it somewhat) for taking photos inside the station. As for door/window frames, I am going to be doing those for sure. I like the 4-plane glass idea (and I already have LOTS of clear plastic to use for the "glass", thanks to the mutliple Legions packs I bought). I'm going to focus on finishing up the outside this week, and then moving on to the inside next week. This is a pretty big project now that I'm really thinking about things, but I'm already planning my next set and designing it, so this is going to be fun! |
This is magnificent. Please put it in the how-to's. When my boys get older, I would like to find this again and try some things out.
This is something that could actually be saved, used, and played with. Well done! (And bonus points for using a Hasbro Toy Shop box... ;)) |
ok then!
Well, then,... how about you shut your mouth and get back to building this wicked diorama? ;-) Less talk more action! Personally, I'm at work and you are distracting me with your thoughts of diorama grandeur! Geez!
I petition for this thread to be moved into the HOW-TO section where it so rightfully belongs. If Seph can pull off what he's described, this will be a dio for the ages my friends.... for the ages. I can't wait to see this come to fruition. I'm already addicted to it... you had me at "Snake Eyes..." Seriously tho- your pics and ideas sound wicked and doable. So let's keep it coming. I'd love to hear your ideas/conception for the radio tower... I just sent my wife on a shopping spree at a local hobby store for some ground flocking... so that tonight after dinner my son and I can get busssaaay... Rock on! Let's see if we can get some more folks on this board to comment, make suggestions as we go. There's some talented people on here. In the words of Peter Griffin, "let's unscrew the legs, take the cushions off... it's easier than we're making it!"... Cheers! ~ Paul. |
Here's where we were at when last we saw the Communications Station:
 Duke decided we're making ledges/walls for the roof so his troops don't fall off. As you can see, he's cut up some 1.5" high pieces, using an X-acto, a 24" straight-edge, and a "cutting board" courtesy of Red Baron pizza (yummers).  After taping over all of the edges of the ledges (rhymey), we've temporarily secured them to the roof.  Hmm...judging from the noise on the roof, either Cobra is dropping in unexpectedly, or Flint decided to get fresh with Lady Jaye...unsuccessfully. As you can see, there are some gaps and off measurements on my part.  Flint and Duke discuss the finer points of romance while Snake Eyes wonders just who this "Red" is that Duke keeps using as his example... Anyway, I've gone ahead and lined up the roof with the building and temporarily secured them together to get a better idea of what the final product is going to look like. Keep in mind that both the roof and a cut-out section of the backwall is going to be removable to better enable pics from the inside.  I get a "WTF" from Flint because of the front ledge sticking out from the building. I think it works to my advantage, though and looks pretty good. Whatever, Flint!  YorkTown, thanks so much for your kind words. I'll try and make this as "How-To"-y as possible. I am having a blast doing it, so I think you and your boys will too. My goal is to make something that is a lot of fun to play with, but also looks cool in a dio as well (unlike most toy playsets). I've decided to go with a foresty setting, as I'll be able to use this playset more often in the future and in different ways (maybe a 'Nok hideout, or a Cobra base, etc). Maybe more later...it's nap time now (I work third shift for a teleradiology company in Cleveland, OH). Keep the comments, suggestions, etc. coming, please. I can only get better, thanks to you guys, and that's the idea here! |
Quote:
Blue Harvest, nice. The couch bit was my favorite part of that, haha. Oh, I've got an idea or two about the radio tower...I think that's actually what I'm going to work on tomorrow, as I've already got most of the pieces for it. Now that I think about it, it's going to be pretty cool. It, also, will be removable from the roof. I want to be as modular as possible here. Also, expect to receive a drawing of what I have in mind for my next project in the next couple of days (I'm a fan of reciprocity, and you sent me a kick-ass drawing already, so...). I think you'll REALLY like it. |
Sephron, please go in and re-submit the photos.....
When threads with pictures embedded are tranfered to another forum, you have to re-insert them...... And don't NOT put something this good in the 'How-To' section again!!! That's an order!!! ;) :cool: :D |
Ok, I couldn't sleep today. Great! I have too many ideas running through my head. I decided to start the tower/antenna array. I even painted!!
Here, Duke has cut some balsa wood and popsickle sticks for us to use. I decided to go 16" high, 2"SQ.  Snake Eyes pitches in and we paint the pieces up. I found some old (really old) Apple Barrel Crimson paint and used that. It's just a tad chunky in spots, but seeing as how this is a metal tower that's constantly exposed to the elements, the paint would look weird in spots, bubbling in the heat, fading here and there, etc. That's my excuse anyway. 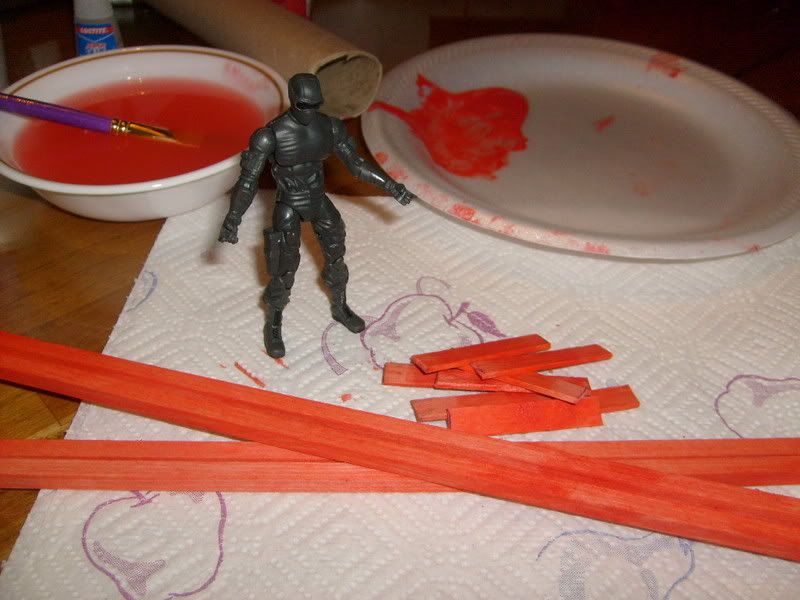 I super-glued it together, and voila, the frame for my tower is up! Here's a far-away view.  And here's a closer look, as Duke wonders when the hell Skot is going to sleep. 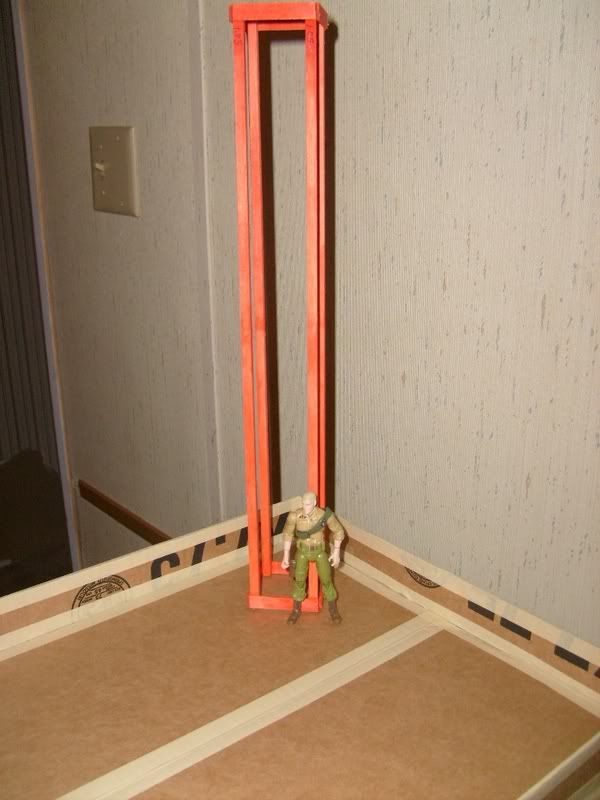 Flint, man, give it a rest!!  I'm feeling pretty darn tired now, so perhaps now I can lay down for a few hours. I don't know, though...these ideas just keep racing through my head! Tomorrow, I shall finish up the tower, and start on the various dishes and whatnot that shall adorn it. I am quite pleased with the results so far. |
I like the setup Seph, can't wait to see what you do with roof stuff and the exterior, so I hold back judgement till you get it all complete hehe, but it definitly looks like a very versitale structure, nice work bro!
|
Well, we're having a bit of a blizzard here in NE Ohio, so I didn't get a chance to go to Michael's after work today. However, that doesn't mean I shall not do anything! After working some more from home, I had a little bit of free time, so I decided to see what I'm going to do about the windows.
Here's what the window looks like beforehand. ScarFace and a Fred-series Crimson Guard are preparing to strike, whilst Flint moves in on LJ again. Give it a rest, lover boy, Cobra is about to strike! 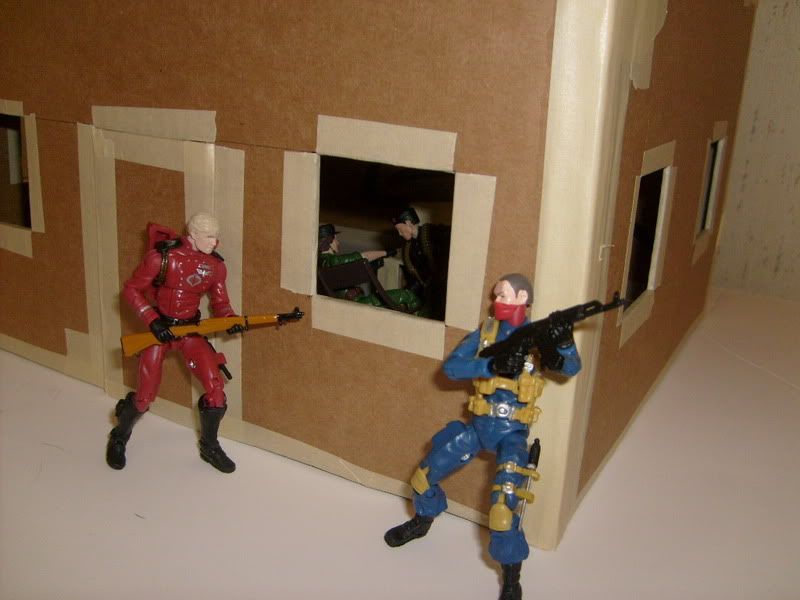 I've cut up some more popsickle sticks. What I'm going to do is take some masking tape and fold it over on itself, effectively making it double-sided. Then, I shall lay one piece below the window on either side, and then one within the frame itself. I won't be using tape in the final product, but this will give me a better idea of what it's going to look like. 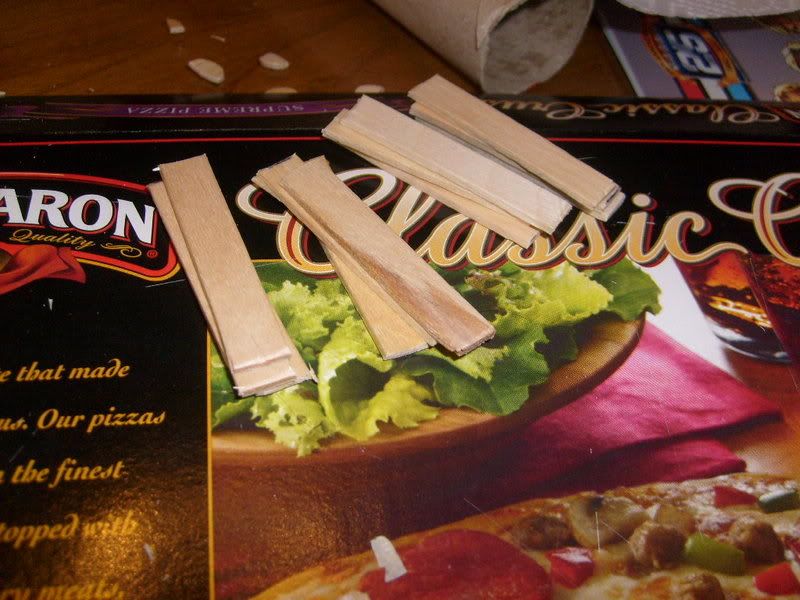 If you're a mackin', when Cobra's attackin', you best be packin' Snake-Eyes a backin'. :) Just a super quick photoshop and a view of what the window is going to shape up to be.  Here's a closer view. As you can see, not only is Flint safe from harm, but we've the makings of a window here! 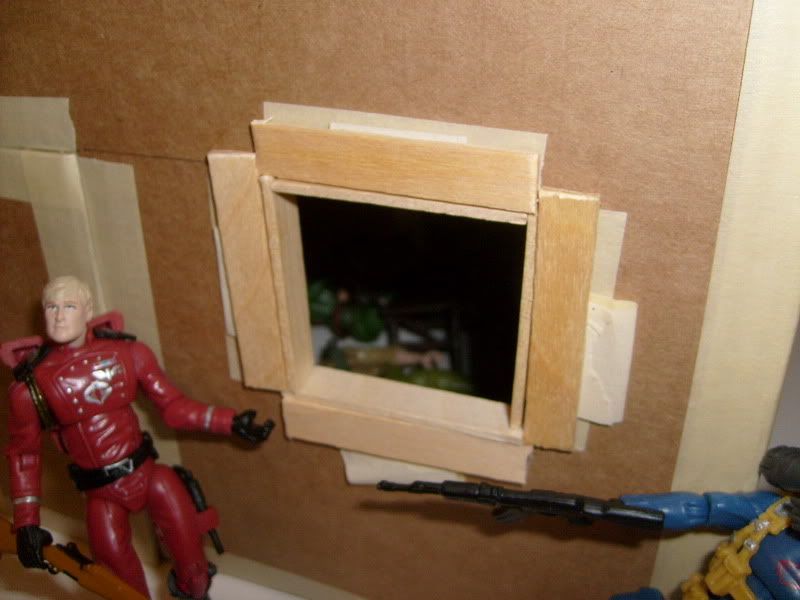 I may work more on the tower tonight, but we'll see. Perhaps not until tomorrow, or Thursday. Also, I think I figured out what I want to do to the exterior, so this weekend babies, it's going to be balls-to-the-wall so I can knock this puppy out! |
This is coming along nice. I'm excite to see the finished product.
|
Coolio
You let a little thing like a blizzard get in your way? Geez Man! Get committed to your project! Don't make me hop a plane to Ohio and show up at your doorstep.
Window framing is looking good. I would say tho, that once you add on the exterior, it will have some thickness which may throw off your mock-up a little, but hey, that's all part of the lovely give-and-take ;-) Looking good, looking good. I am dying to see how you're gonna outfit the com tower. I'm giddy with glee. And I want a Red Barron Pizza - we don't get those here in Canada. It looks Mr Pibb delicious. Cheers! ~ Paul. |
Quote:
Ugh, my drive home is normally 35-40 minutes, but it took me almost an hour and a half. At that point, I said to myself "screw it, i'm going home and staying home". After making some food and watching The Sarah Conner Chronicles I didn't have much time left before bedtime. I had to wake up early, go outside and shovel so my fiance could get in the driveway. I spent some time with her, went back to bed, woke up and am now back at work (5:20am, Wednesday morning). Plus my new puppy demands attention. Oh yeah, I almost forgot, GET OFF MY BACK!! :p About the framing, yes, when I add the exterior, I won't be following exactly what I have there. I just wanted to feel productive but was exhausted so, yeah. I shall be picking up the remainder of the supplies I need for the exterior on Friday and my goal is to have the outside of the building finished up by Sunday evening. That includes the outer walls, the door, detachable roof and back-wall section (wait until you see my ideas for that...), the comm tower, and AC unit for the roof, windows, etc. I've quite a ways to go, but I think I can do it. Here's a mock-up of my idea to make the roof (and back wall and tower) removable/reattachable. I did this at work, haha. 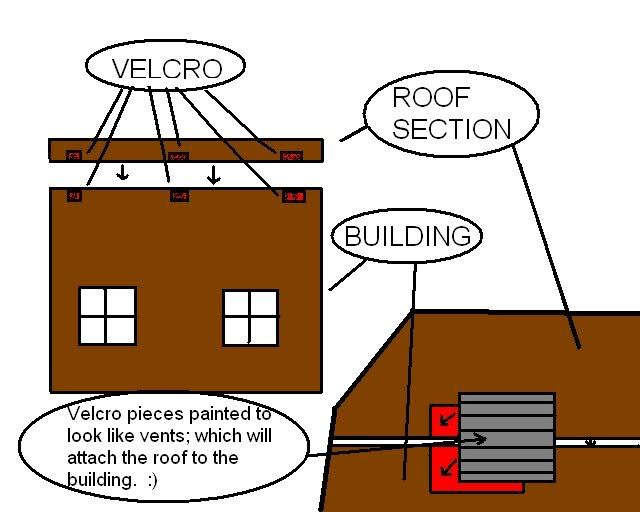 What do you think?! :) |
Painting something like velcro to look like something that blends in (a vent). That's brilliant AND functional.
Great idea. That makes me feel really good about my coffee can brick exterior castle round I'm building. :rolleyes: Seriously, Sephron, Haradrel and Fifth, thank you for all this how-to idea-sharing. This is helping a lot of people in our current era of no new playsets... |
That velco idea is a good and and i like the way your doing your roof.
i found this site and i thought about your com-tower station when i seen it. It's free downloads for paper models of some Radio Telescopes. http://www.nro.nao.ac.jp/alma/E/out...papermodel.html |
Quote:
Holy crap, that's awesome! Tracker, you're my new hero. I am now going to have to utilize this. Amazing stuff, and thanks for thinking of me! |
Quote:
See, you said the magic word to me...PLAYSETS! I want something that will look cool and is fun to play with at the same time. I'll admit it, I like to play with my Joes, take cool pics, set up all sweet-like. I've been greatly inspired lately, so much great work going on...not just the "How-To's", but the dios, the pics, seeing all of the new 25th stuff coming out! I haven't felt like this since the mid to late 80's, early 90's...and I was a kid then! Post some pics of that castle, bud. Watching this stuff come to life is awesome! |
Wow - cool idea!
I dig your mock-up. I agree with yorktownjoe that it's a fantabulous way to get function and use it for detailing in a dio. I may have to borrow this for my upcoming 2-storey ;-)
Quote:
Brother - no problemo... now you've peaked our interest in this "coffee can brick exterior castle" masterpiece you have mentioned. Open up a thread in the how-to and show the world baby! Put it out there! I'm sure everyone would agree, that we'd love to see it. Quote:
Wow - thanks for finding this. I'm gonna try making some of these shortly, just to see how hard it is to make them look like the pics shown - cause that would be deadly! Quote:
Sounds like you have a life! Lol... and crazy shift-work. Your project is coming along, your ideas are coolio - so thanks for sharing. My son and I Appreciate it. Cheers! ~ Paul. |
Np i just thought these where neat pieces.
|
Cant' wait to see the finished product. Are you going to paint the cardboard, leave it as is or layer it with something?
|
Quote:
I'm going to go with manufactured wood slats from Michaels and paint them, I believe. Probably a deep brown, as this is in a forest setting, or possibly a dark and weathered grey color, with patches of green and brown, from the wear and tear of the surrounding environment. Any suggestions, oh great one? |
*sigh*
Ok, I've made some progress today. My fingers are blistering and my back and arms hurt (cuz I'm, apparently, some kind of sissy-boy), but I present more of my Comm. Station...a work in progress... I'm semi-pleased with it, as it's coming along. I've made some mistakes, learned quite a bit, but I think, in the end, I'll be happy with it. And that's pretty much why I started it. Here, you can see that I've seperated the walls and began cutting up the wood-slats. I hotglued them to the cardboard and it holds quite well, very solid. Gotta be quick, though...as the hot glue cools fast, so apply the wood to the cardboard quickly and carefully! Also, I did the window/door frames. The miter saw was a handy little tool to have for this! 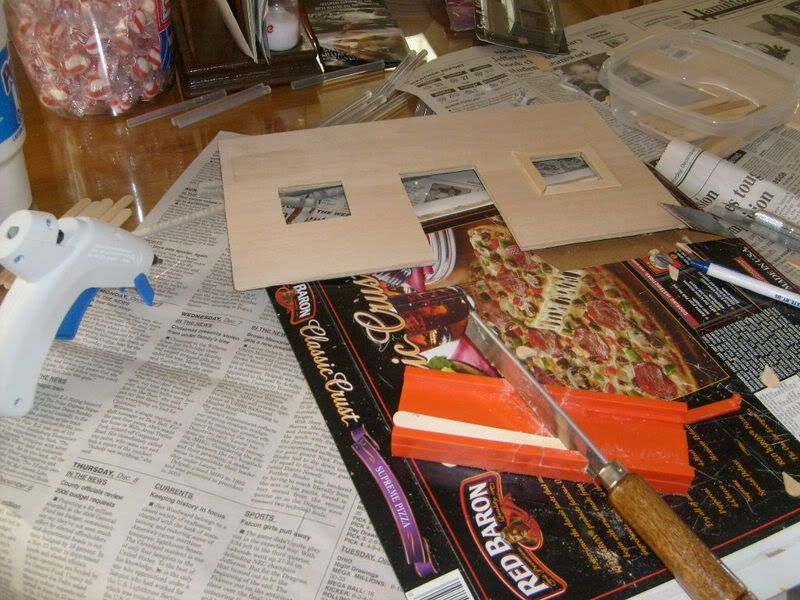 One side down... I've stained the wood, and I like the dark color. It helps to hide the mistakes/imperfections a little better, plus, I think for a foresty-type of setting, it'll look nice. Check out the window on the right. Yeah, definitely didn't measure twice before cutting once. 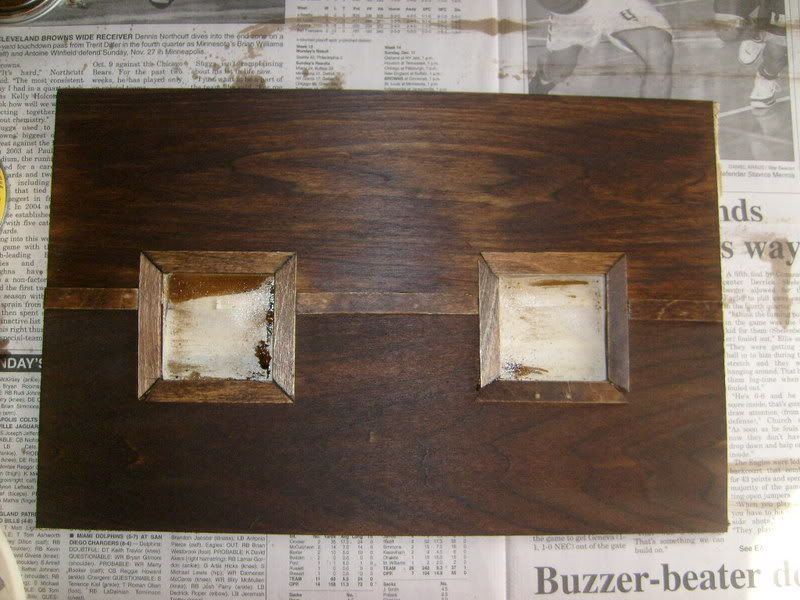 I improved my window framing as the day wore on... 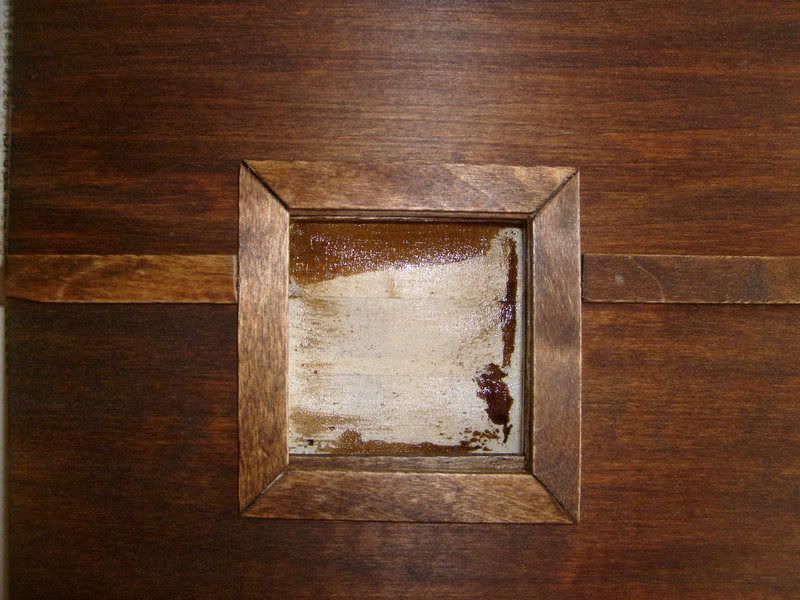 Hmm, it's starting to actually look a bit more professional...a bit more like a building...a bit more like a GIJoe Communications Station!! 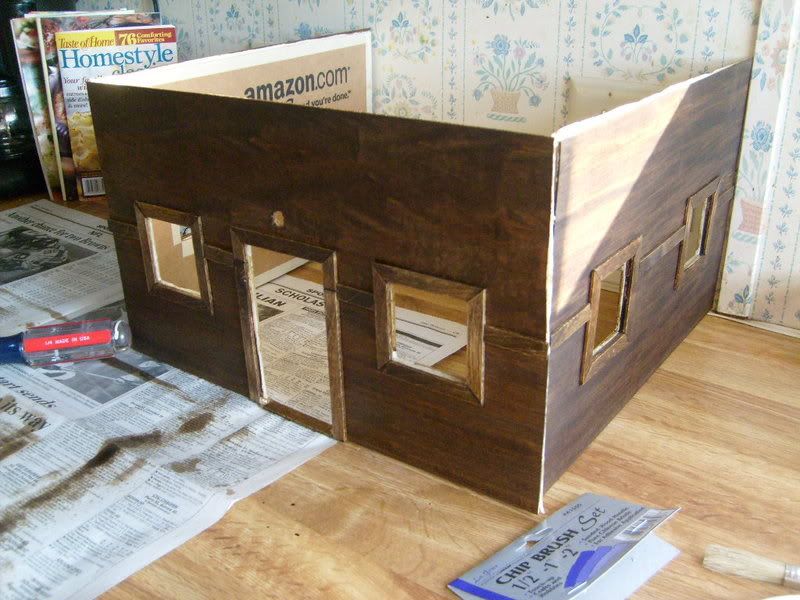 Now this is something I'm especially proud of. These really awesome lights with a super-bendable/adjustable neck are available at WalMart for less than $3. Well, I carefully poked a hole through the wall, and carved it out, gently, and pushed the head through, shaping the neck as I needed. I attached the body of the flashlight to the wall behind (temporarily). I'm going to make an awning to cover up the light. 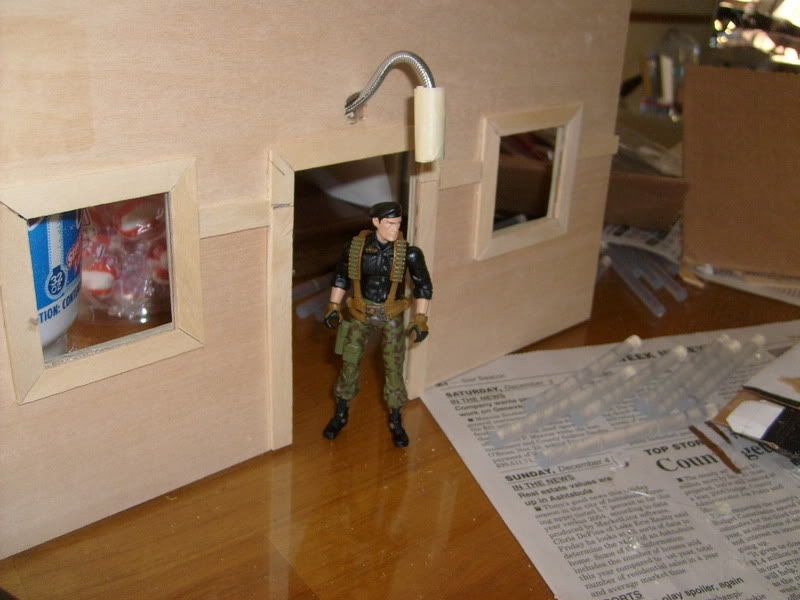 Flint, at night, coming out of the Comm. Station...the light barely illuminating the path in front of him. Something doesn't feel right here...  These pics were taken in a completely dark room, no flash. The only light provided was from the flashlight. I like it a lot. I bought 8, haha. 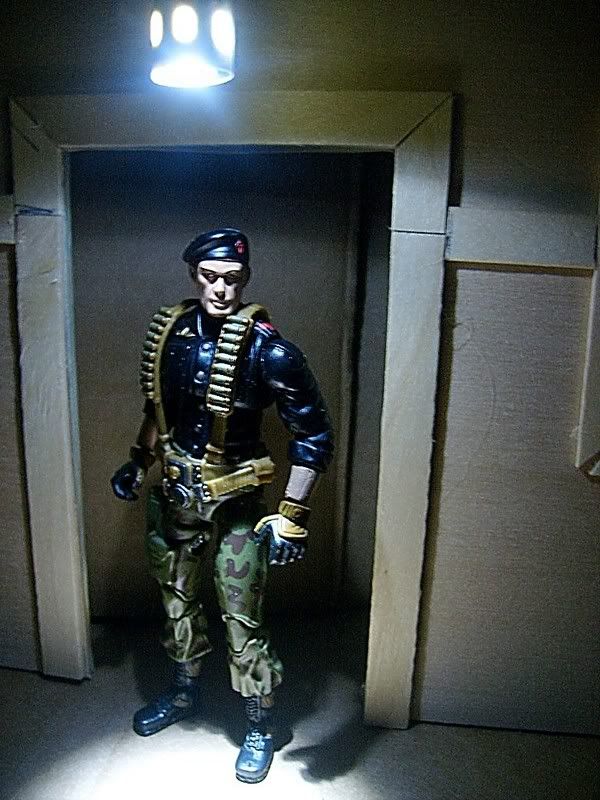 So, that's where I'm at at 5pm on Saturday. I haven't slept in almost 24 hours and boy am I feeling it!! Plus, I haven't eaten since 2am at work...all I had was a Toaster-Struedel at 10am. So, be kind, but how do you guys think it's shaping up? |
Pow!
You're shaping up sexy and fruity delicous...
Dude, this is seriously nice. I love the wood stain, it's gonna look sick in a forest setting. The light is a cool idea, and with an awning covering it, it's gonna be super-functional. Door frame and window frames look good, I like that you broke up the building with the molding half-way up. This is turning out very cool. I will however warn that your constant whining in that last post to be a sign of weakness. Don't give into the evil - suck it up and press on. The rest of us here on joedios don't care if your fingers are bleeding and you haven't slept... Just ask yourself, what would Flint do if he was on the job? Schweet job Skot - it's time for some old-school ACDC - that'll keep you going. Cheers! ~ Paul. |
Quote:
Ha! What's really funny is that the entire time I've been working on it, I've had Metallica playing, haha. Thanks, I appreciate the sentiments. The molding half-way up is actually covering the seam where the two slats meet, so it's form and function. After I'm nearing the end, I'd like to have some type of vine going up the sides in spots. So, next, I tackle the back wall, with removable section, and then the roof. The roof will be interesting... I think that it might come out very well and be my favorite part. We'll see. Thanks again! |
wow terrific. The light it a really awesome idea and look just right with the figs and what your doing with the wall is interesting can't wait to see more.
|
Quote:
Nothing at all, I think your doing a great job. I can't wait to see it finished. |
Quote:
Thanks VFX, that means a lot, coming from you. I've done quite a bit of work on the roof. I'll post pics of that later today. |
Ok, small update:
I added some thickness to the roof. Good ol' cardboard! Then, I took some wooden dowels and created a ledge. It has a sort of step built in to it. 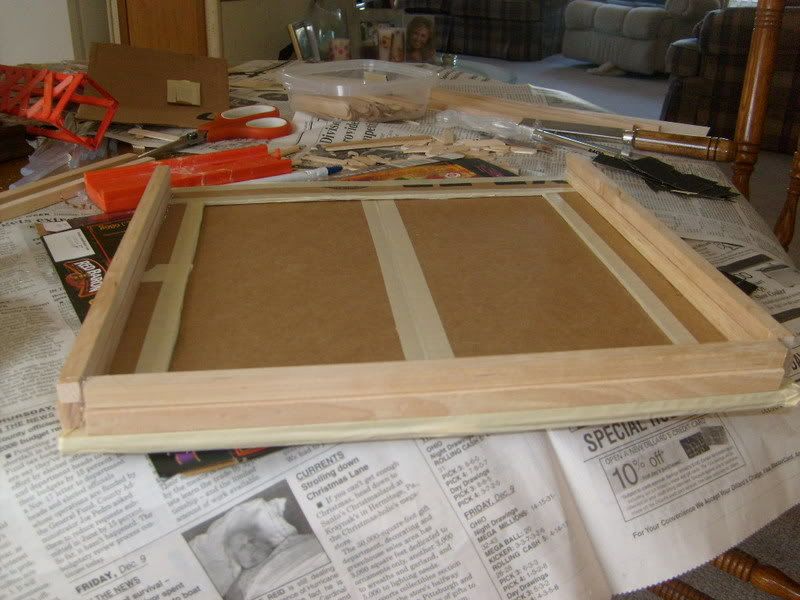 Here, I've sprayed it wih "Stone Touch" spraypaint I found at Michaels. "The look and feel of Stone". I gotta say, it's great! I'm impressed. It truly does feel like concrete! The color is a little lighter than I thought it would be, but I'm going to darken it up a bit, possibly with a black wash. 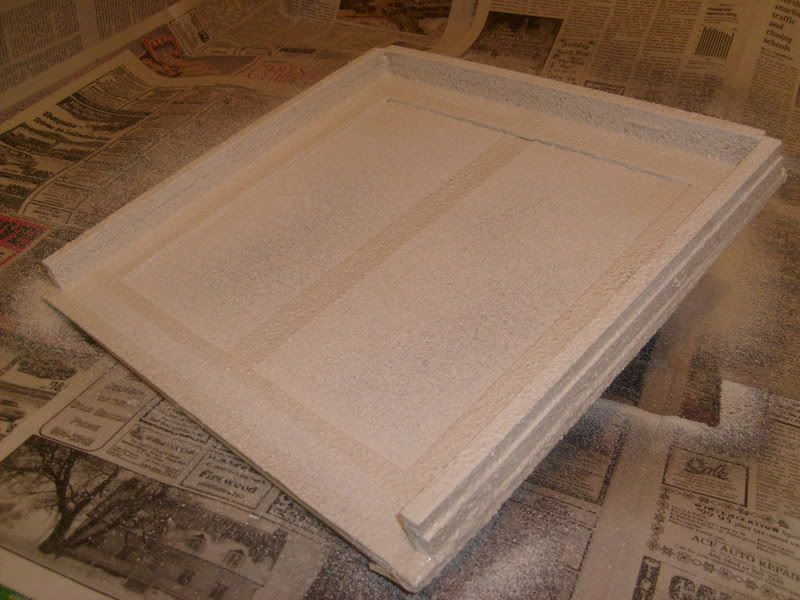 Well, I temporarily propped it all up and together to see what I'm looking at so far. I have to say, I'm almost liking it!! :) It doesn't look too bad. It's still a good ways from complete, but it really makes me happy seeing it come this far. 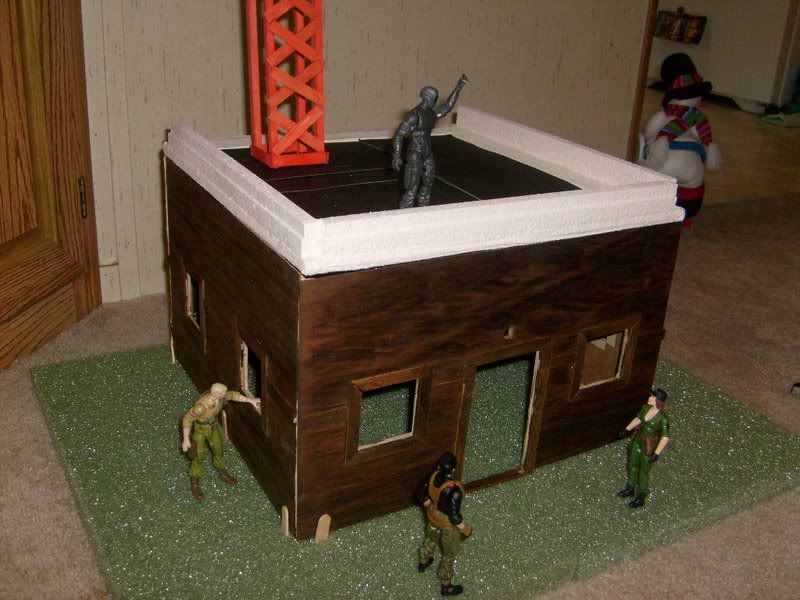 I added a super fine grit sandpaper to the roof to give it that tar-paper look. It feels just like a roof like that would! It's not rough to the touch at all, either, and I'm probably going to weather it a bit, making scuff marks and indents where water would've settled. The tower, well, I wasn't that happy with it, and I'm still not, but I do like that it'll be there. 5thC suggested a darker color for it, like a green, and I'm leaning that way. I also might scrap what I have there and start from scratch with a different design. We'll see. The back ledge was left off because I am building in a ladder from the ground, attached to the back of the building, so I need an opening for it. Gotta have roof access!! Snake Eyes is impressed...so am I! 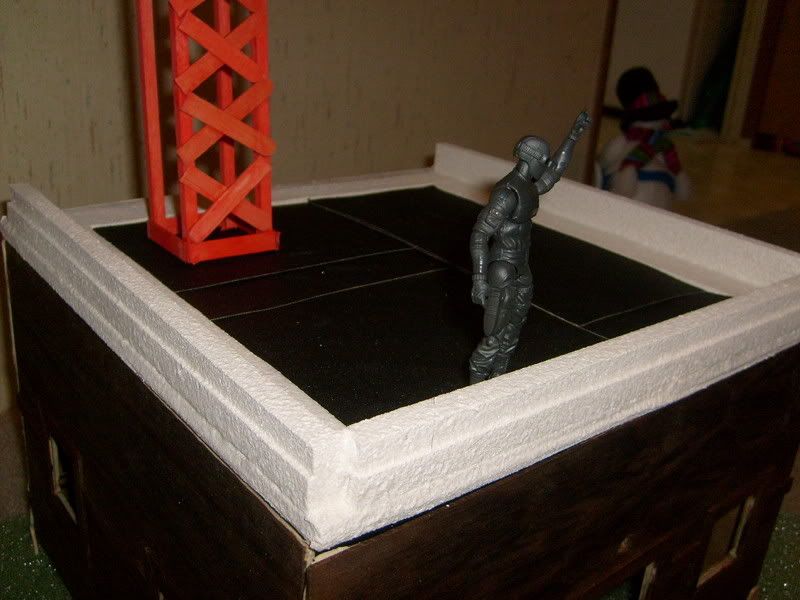 Just another (blurrier, sorry) view. 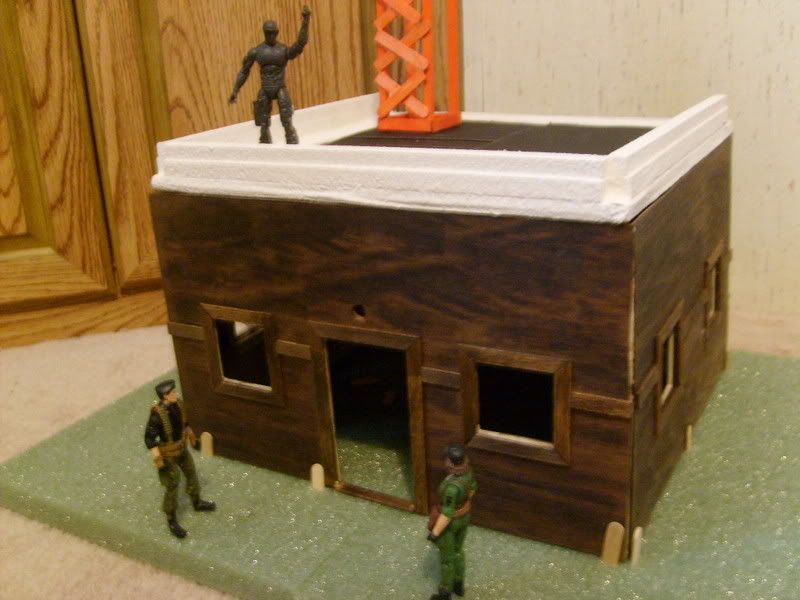 So, that's where I'm at. I'm going to tackle the interior walls and floor before attached it all together. Alright, homeys, what say ye?! |
Kapow!
Here we go. Sexy like starburst on the morning train. Now it's lookin like something. I'm liking the roof design, and the sandpaper/tarpaper look on the rooftop is ingenious. Brilliant idea. Who said that teleradiologists were uncreative misanthropes? Not me my friend.... not me.
Are you going gravel for the floor, or a dirt? The corners - where the walls meet each other - on the exterior I'm talking... you need a flashing or something to cover that up. You could put two sticks together to create a 90 degree piece and stick it on... that's my only constructive comment. Is that clear what I just said? Or do you need me to hold your hand like a small child, chapter and verse per se? Looking fantabulously good Skot. The whole thing is coming together like a supposedly secret videotaping of a Gene Simmons drunken orgy. Congrats. Paul. (your Canadian brother to the north and way, way, way west) |
Quote:
Brother man, if by "floor" you mean the ground outside, then a dirt/grassy type. The floor INSIDE the building is going to be woodslats, unstained, just plain ol' wood slats. As for the corners of the buildings, don't you worry your silly little head, my good man, I've got that "covered", so to speak (un petit peu tongue-in-cheek). I just finished "wallpapering" the backwall, and painting the borders up (a real sick Hunter Green, god it's sexy). I'm going to wait for those to dry a bit and glue 'em on and then post a pic of it. Then, put a fork in me, I'm done for a while (sleepy-sleep time for this big baby). |
Coolio!
Quote:
Sounds good Skot - It's all looking really really good. I'll be showing my son when I get home from work today. Cheers! ~ Paul. |
That darned impressive. I like how the roof is coming a long.
|
Introducing, the finished back wall:
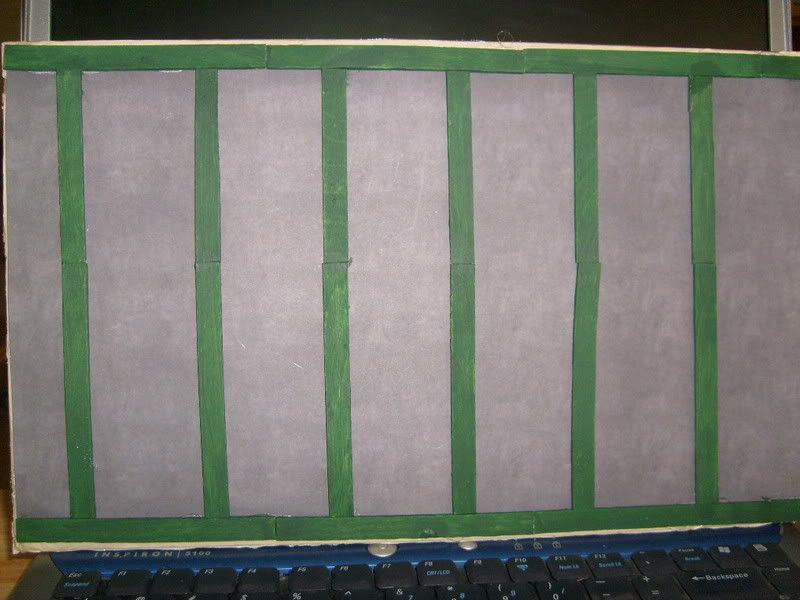 I dig it. I soooo can't wait to finish this bad boy!!! Now, there are aspects of crookedness, and in the future, when making a wall like this, I think I'm going to get some long, thin wood slats and just make sure they're cut to length and forego the popsickle sticks. I wanted to work with what I have, though. I still think it looks good and once I have items in the building, it won't be noticable. YO JOE!!! |
Fifth, sephron. When are you two getting married? (I'm kidding! someone had to say it! :) )
I'm loving how this is coming along nicely. I'll probably do a step by step over a weekend in the near future for a building/shack or whatever, but if I don't finish something in one or two settings it never gets done! So Kudos to you sir(s) for sticking to it. ;) |
Frak. amazing what you can do with cardboard. When i painted cardboard, you could see the ridges in it! I don't know how you do it, but dizzam...
|
Quote:
G, I didn't paint the cardboard...that's printed out cardstock "wallpaper"...it's the "concrete" file from our very own file section!! :) |
Quote:
Haradrel... the true story is that Sephron proposed to me but I had to send him packing when I found out that he has a love-child in some woman's oven. Wasn't meant to be. I will say however, forgetting about his recent infidelity... that his building here is coming along nicely. Cheers! ~ Paul. |
Quote:
Thanks for airing our dirty laundry in public. :eek: How humiliating... |
| All times are GMT -7. The time now is 05:04 PM. |
Powered by: vBulletin Version 3.0.6
Copyright ©2000 - 2024, Jelsoft Enterprises Ltd.