
 |
Custom Cobra Chinook - CH-46 Sea Knight
I picked up this Chap Mei Chinook at TRU thanks to the praise of Flatline, Outrider & ender098. Everyone calls it a Chinook, but jjsvipers set us straight & let us know it is really a CH-46 Sea Knight. I like the sound of that - Sea Knight sounds like something Cobra would use. I do not normally use non-Hasbro/GI Joe vehicles, but this thing is huge, inexpensive, has great potential & Cobra needs a copter to match the Tomahawk. :eek:
I am not going to do any major mods to this thing, but to do what I needed to do I wanted smaller pieces to work with, so disassembly was step #1.  Taking it apart was simple, just remove all the screws, and there are alot of them. There are several different size screws & I made the mistake of not keeping them organized & just let them drop in my bucket as I removed them. This made reassembly a little more time consuming. :mad: The next step was removing that huge horrible star off the side :rolleyes:  I used Testors paint thinner, lucky it worked very well & no acetone was needed. I used a Q-tip to remove the paint with small amounts of thinner at a time. The copter is molded in black, so the grey camo is paint & I did not want to remove that, so the Q-tip worked perfect for a controlled removal of the unwanted paint. After the paint was removed, I used a leather chamois, to shine the spot up. Now you can not tell there was ever anything there, and it shines like the rest of the vehicle. :) |
Next I painted all the small parts & trim of the copter. I have seen these in several different colors, mine was in maroon :confused:
 Krylon Fusion for plastic, Satin Black - no sanding neccessary & it dries in 10 minutes, pay the extra money, it is worth it! After the paint dried, it was time to detail the small parts. First the cockpit: 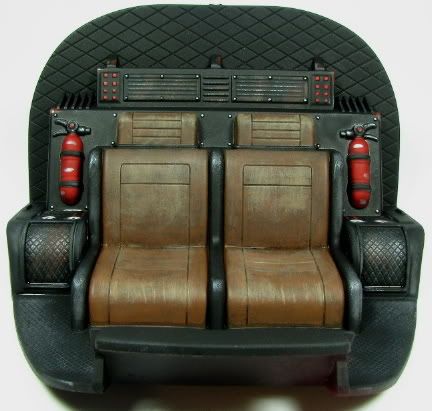 I use Model Master leather for the seats, gave it a black wash & them drybrushes tan for a well worn look. Painted the bolts silver, highlighted the buttons & fire extinguishers red. The gauges (hard to see at this angle) are painted white, with silver trim & red pointers. Weathering was done with silver & rust drybrushing. Everything was given a black wash, then sprayed with Testors Dull Coat. Then the rest of the small parts:  Same thing - silver & rust drybrush, black wash & Dull Coat |
I wanted some bullet holes, I use a hand drill, then paint the hole silver
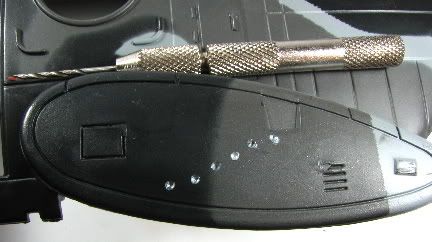 More detailing:  I have seen some people dispose of the hook, but it is too cool!!!! :D You pull it out & it ratchets its way back up, add the cargo net & it is one cool accessory. It just needs a little help: 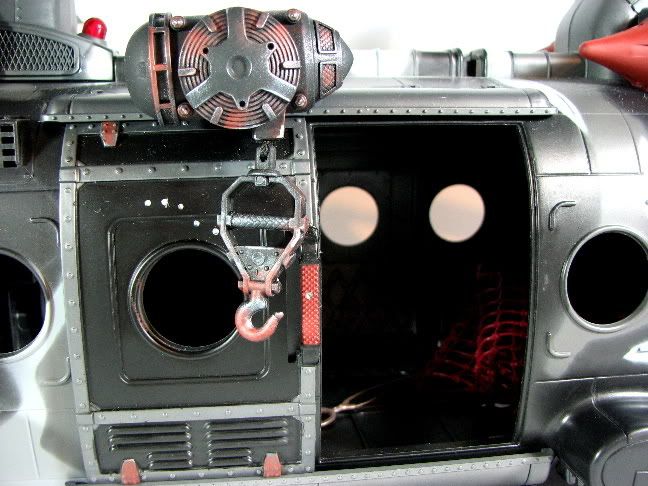 |
Rotor detail
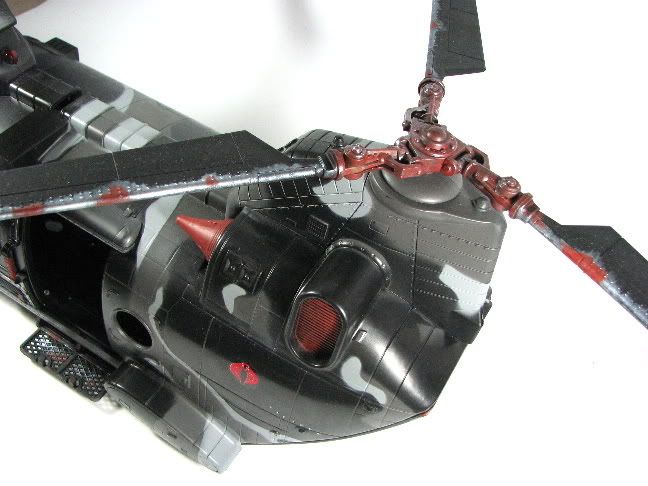 Rear cargo door 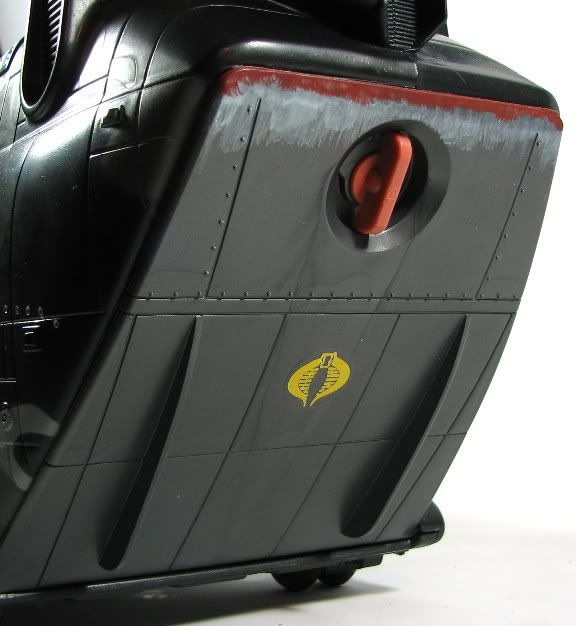 Reassembled  This is a work in progress, I am by no means done with it! I still have LOTS of weathering & maybe some more bullet holes to add to the body. I just wanted to share with you what I have done so far! :) Thanks for looking, check it out soon in the photo section. Dave |
Daaaaaaaam!!
:eek: WOW DAVE YOU DID A HELL OF A BETTER JOB THEN I DID ON MINE. I MAY HAVE TO TRY MY HAND AT IT AGAIN. TRUELY GREAT WORK VADER. ;)
|
Quote:
Thanks Marcos. One thing about this copter, it is way under gunned, it only has the single front gun. A real Sea Knight has a .50 cal door gun, mine will too very soon! :D |
I love your detailing. The paint scheme is great. I cannot say enough great things about your job. The bullet scars are a great detail.
|
Quote:
SA-WEEEET ;) I CANT WAIT TO SEE THAT AND SOME PHOTOS OF IT IN ACTION |
Nice work!
Nice work Vader, I'd agree with your assessment, considering what the T-hawk has at it's disposal for armaments you'll need another gun on it somewhere. :D
Very cool work so far though V. Good stuff and thanks as always for sharing. |
Quote:
Agreed! This is a fine customization that lets us see the potential of what a good paint job can do! |
| All times are GMT -7. The time now is 08:43 AM. |
Powered by: vBulletin Version 3.0.6
Copyright ©2000 - 2024, Jelsoft Enterprises Ltd.