
 |
W.I.P - Lego Built Shipping Container (GIJoe/Microman Scale)
So I recently decided to stop collecting Lego, at least.. the little guys and the little sets, but i plan to keep the bulk of the Grey lego to build scenery. My first project is a shipping container in scale with Microman/GIJoe figures.
Here are my work in progress pictures. I am currently working on some military customs as well. So when they are finished i'll upload some pictures with the shipping container. 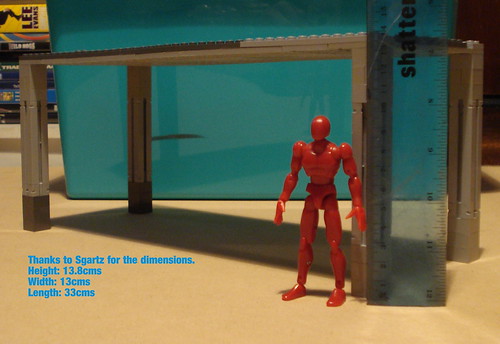 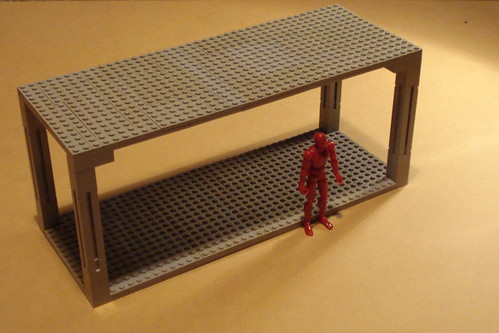 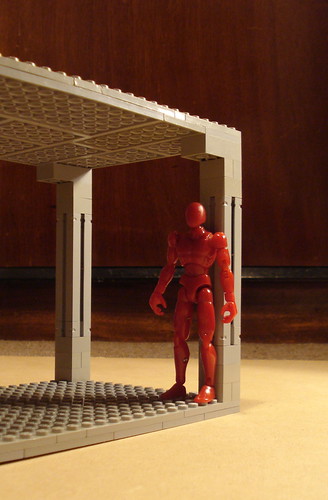 Yesterday I worked out how to build up the side panels to give the container that distinctive corrugated look. 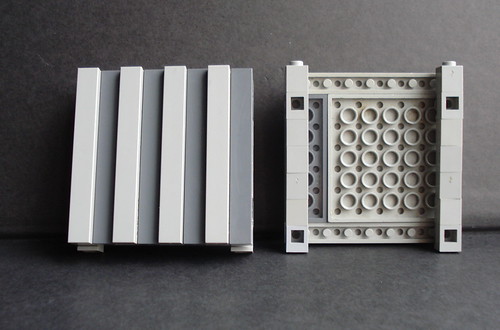  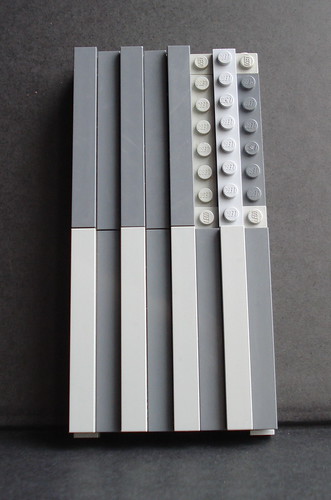 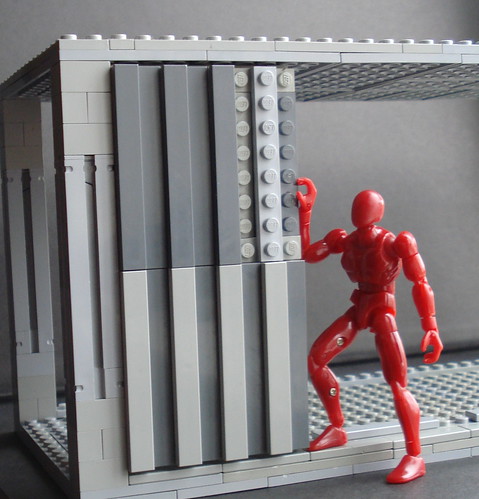 I've used 1x8 grey plates and 1x1 headlight bricks to build the panel first, then used 1x8 grey tiles vertically to give it that look. When I get my lego orders in from bricklink i'll post up some more photos of it in progress. Hope you like the photos. |
Thats pretty damn cool there buddy!!! Would be expensive and time consuming if you are not into legos thow.
|
Looking forward to the finished product. :)
|
Shipping Container
Thanks guys!
I should let you know that even if you are into Lego, it will cost quite a fair amount of cashola anyway, the sheer volume of parts involved in making a shipping container this big would mean you'd have to order parts anyway. I prefer not to look at costs as a negative issue.. besides its not like i have any thorough complete control over my addiction.. :p oops. I meant Hobby! :o Anyways. I've ordered 40x 1x1 headlight bricks, which you can see being used with 1x1 regular bricks to prop up the side panels. I'm hoping this order arrives today so I can at least finish 1 side of the container and take an updated picture to show you guys. Please also stop by my other thread titled 'communications room' because I have that project in the works as well. Rich |
Update (2 extra pictures)
2 more updated pictures, one showing the complete 1st side and the other showing inside the container.
 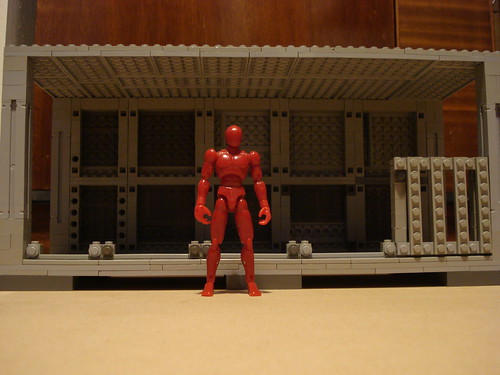 I'm waiting on a couple of parcels from Germany to complete the 2nd side of the container, in the mean time I have been working on designs for the opening doors :-P I will post up the work in progress shots later on when I've finished editing them. Rich |
Lego Shipping Container - Doors/Hinge
While I have been waiting on some parts to arrive from Germany, yesterday i sat down with some plates,tiles and some other various pieces to construct one side of the opening doors. I've come up with a nice design using the 1x1 modfied plate with clip. Basically as a hinge to the grey bar piece. I'll use 4 of these for each door. My one snag at the moment is that I only have 4 clip-plates and one of those is warped/bent, so it offsets the door in a bad way, it's not so much a big deal but on my next bricklink order i'll get 10 of them to be on the safe side. :-D
Hope you like the updated pictures. 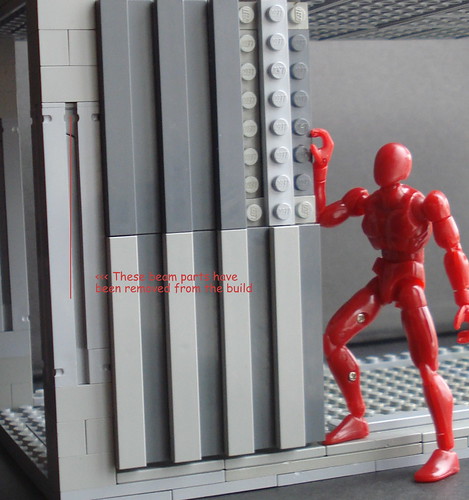 In these next 2 shots you can actually see one of the 1x1 headlight bricks slightly off, this is because the 1x1 modified clip plate is bent/warped. 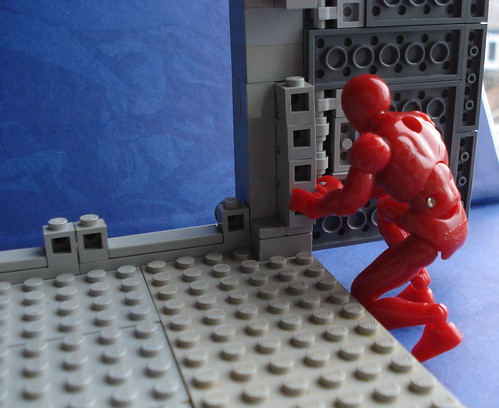  This is how it will look from the outside, i've removed the side panels for now so I can focus on the door/hinge. 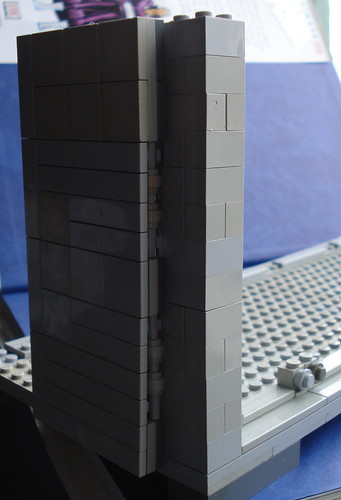 I'll have more updates when I get the 2 orders in from Germany :-D Rich |
Update!
So those 2 parcels arrived! :D from Zimmerman's Spielwaren!
A Very reliable service, and i'll probably order again from the same place for parts in the future. The 2 parcels contained all the small bricks and tiles needed to finish both sides of the container. Now that I have this finished I can concentrate properly on the opening doors as well as look at finishing the back of the container. I thought I'd post some pictures up here to show you what it looks like now I've finished both sides. 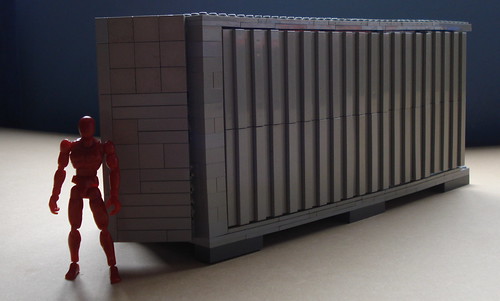 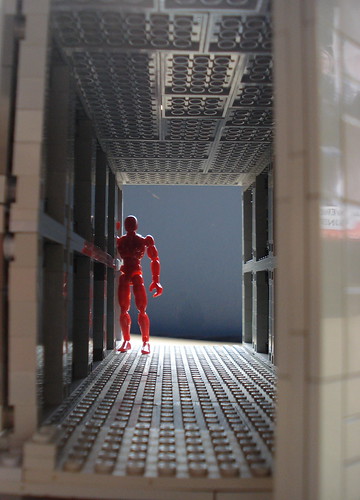 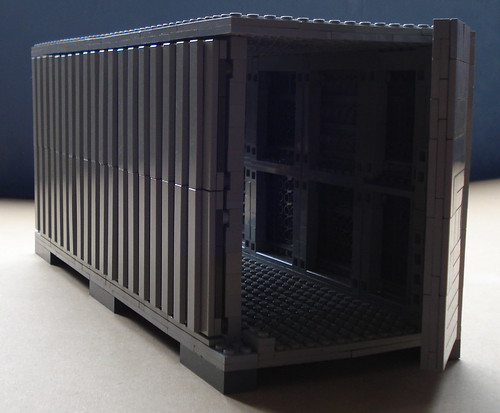 Hope you like the updated pictures. The door that is on at the moment is the right height but its x1 stud wider than I wanted it to be, i'll have to order some modified clip plates and work on the design some more before it's finished. In friendship Rich |
W.I.P - Lego Built Shipping Container (GIJoe/Microman Scale)
Hi!
I'm pretty much finished with the shipping container, the only remaining feature I am going to add is decorative tiling to roof, so that it matches the corrugated look on the sides. I've got some pictures here to share with you. I hope you like them, it's not completely finished but aside from the roof as mentioned above its as good as completed. I plan to use this in some action figure shots as well at some stage. Here are the pictures: 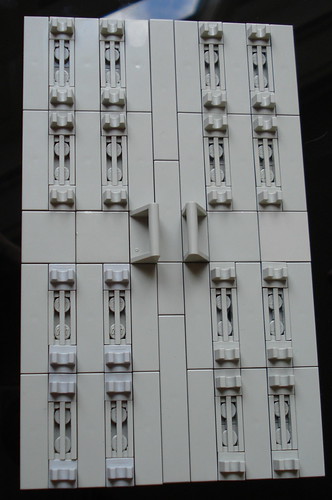 I am very satisfied with the doors, even if they did take 5 hours build time before I settled on something I was comfortable with. 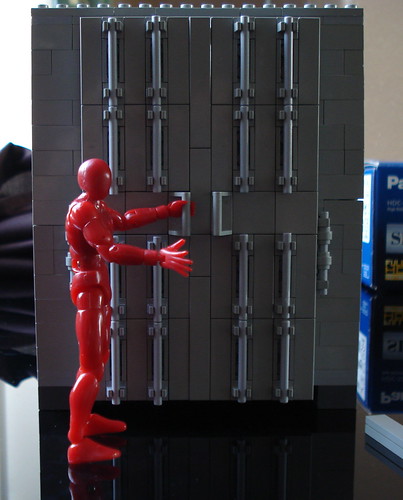 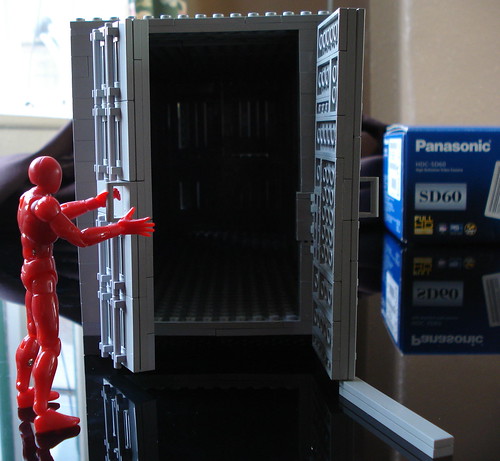  If you want to see all the pictures in one place, theres now a project folder on flickr for it, shows you from scratch and all the WIP pictures. (including mistakes I made on the way). http://www.flickr.com/photos/superi...57626301268760/ 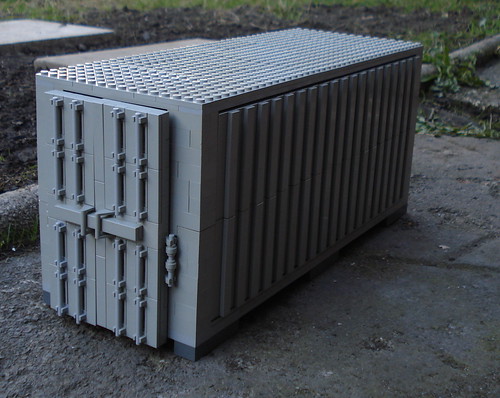 Statistics: Height: 15.5cms (6.1') Length: 34cms (31.4') Weight: 1.3kilograms Width: 13cms (5.1') Features: Plenty of room, fully working doors with interlocked hinge system. Feedback & Comments welcomed. Richard |
That is epic I could just imagine a cobra trooper opening the doors and seeing a vamp or joes pour out.
|
Damn that's awesome!
|
| All times are GMT -7. The time now is 06:02 PM. |
Powered by: vBulletin Version 3.0.6
Copyright ©2000 - 2026, Jelsoft Enterprises Ltd.